Converting WP7 Maps to WP8
After converting a Windows Phone 7 application (What’s Shaking, NZ?) to Windows Phone 8, I noticed a few deprecation warnings around the Maps SDK. Converting the code to use the WP8 Maps SDK instead was fairly straightforward, but there were a few gotchas which I’ve covered in this post.
Note: This post assumes you’ve already converted your Windows Phone 7 app to Windows Phone 8 and are wondering how to get rid of the deprecation messages.
It covers converting your code to use the new Pushpins (assuming you were using the default ones previously - though a glance over the Windows Phone 7 custom Pushpin image docs indicates to me that it should be fairly straightforward to port those over as well, after a read through this), as well as the changes required in XAML.
This post does not delve into displaying routes or providing directions, etc.
Deleting old references
First, delete both the old Windows Phone Toolkit if you were using it (I was using it for the ToggleSwitch control), and the Microsoft.Controls.Phone.Maps library from your project references. If some of your other code breaks (ie, the ToggleSwitch), don’t worry, we’re going to fix that later.
There will of course be references to these namespaces throughout your code. Feel free to delete these now, or as we go.
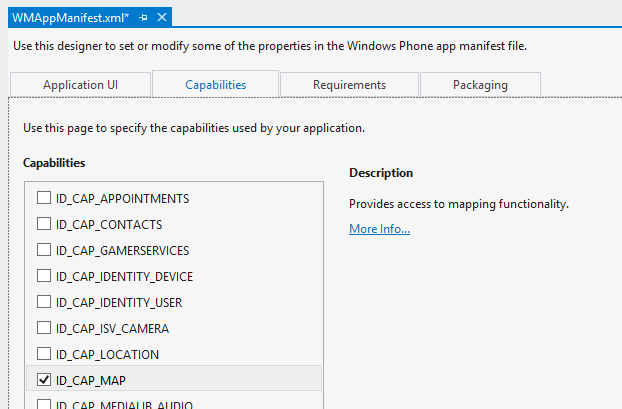
While you’re changing things in the Solution Explorer, you may as well update the WMAppManifest file - you need to include the new IP_CAP_MAP capability.
Changes to XAML
Next, edit your XAML to reference the new xmlns declaration:
1
| |
Now your <maps /> tag will probably show up with some blue squiggly underlines, previously I had this on one of my Map pages:
1 2 3 4 5 6 7 8 9 10 11 12 13 14 15 16 17 | |
However, my new XAML looks like this:
1 2 3 4 5 | |
Much simpler, and all the previous properties I had marked as Collapsed are now collapsed by default (and no longer accessible).
Pushpins
Unfortunately the other part of the Maps that we’re talking about today (the Pushpins) has become more complicated, not less. Where previously you would simply create a Pushpin object, assign it a location and some content (and perhaps an event listener), and then add it via a Map.Children.Add(pin) call, now it’s not that simple.
To add the Pushpins, we now need to download and reference the new WPToolkit via NuGet. Go on, I’ll wait (the new one I used was published Oct 30 2012, was top result after searching for WPtoolkit). We need this for the Pushpins, as they are no longer included in the built-in Maps library (which is now located in the Microsoft.Phone.Maps assembly, as seen above). This should also fix any other issues you had where things from the previous Toolkit were no longer available (once you update your using statements).
Once that’s done, you can start fixing your existing Pushpin code. First, add a reference to the package you just downloaded:
1
| |
The next thing you’ll notice is that the Location property of the Pushpin no longer exists. It’s now called GeoCoordinate, that’s all. That should be all you need to change there:
1 2 3 4 5 | |
Now to add the pin, we need to:
- Create a
MapOverlayobject and add the pin to the overlay - Create a
MapLayerobject and add the overlay to the layer - Add the
MapLayerto theLayersproperty of the map
So let’s do that:
1 2 3 4 5 6 7 8 9 | |
A few things to note here:
- Setting the
MapOverlay.PositionOriginis the point in your overlays content you would like centered on theGeoCoordinate. The overlay has (0,0) as top left, and (1,1) as bottom right of your content. Since we’re using the old Pushpin image, we want (0,1) for bottom left. If (for example) you had an arrow pointing from left-to-right and you wanted the tip of the arrow to be pointing at the location, you would specifyoverlay.PositionOrigin = new Point(1, 0.5);for the center of the right-hand side. - A Map can have multiple
MapLayers - A
MapLayercan have multipleMapOverlays - We have to specify the
GeoCoordinateproperty twice - once for thePushpinitself, and once for theMapOverlayit’s going into.
If you’re adding multiple pins simultaneously, you may want to add them in separate layers or on the same layer. I’ve opted for inserting all pins on the same layer, as I’ve found this exhibits the same behaviour I was experiencing previously - pins added later appear on top - so I’ve found no reason to experiment.
For further reading, check out the Windows Phone Dev Center.
Maps API Key
You may have noticed earlier that you no longer specify the CredentialsProvider in the XAML. Instead we have an event handler for the Loaded event on the map. As detailed on MSDN we now specify an ApplicationID and AuthenticationToken in code. This looks to be very simple, though I haven’t tried it yet (as you get the ApplicationID and AuthenticationToken during the app submission process).
1 2 3 4 5 | |

